Web file browser
- Yaw Nti-Addae
- Monica Franciscus (Unlicensed)
- Deb Weigand
Definitions
Use ownCloud to easily access your GDM file(s) where you can preview, download, and share files.
Folder Structure
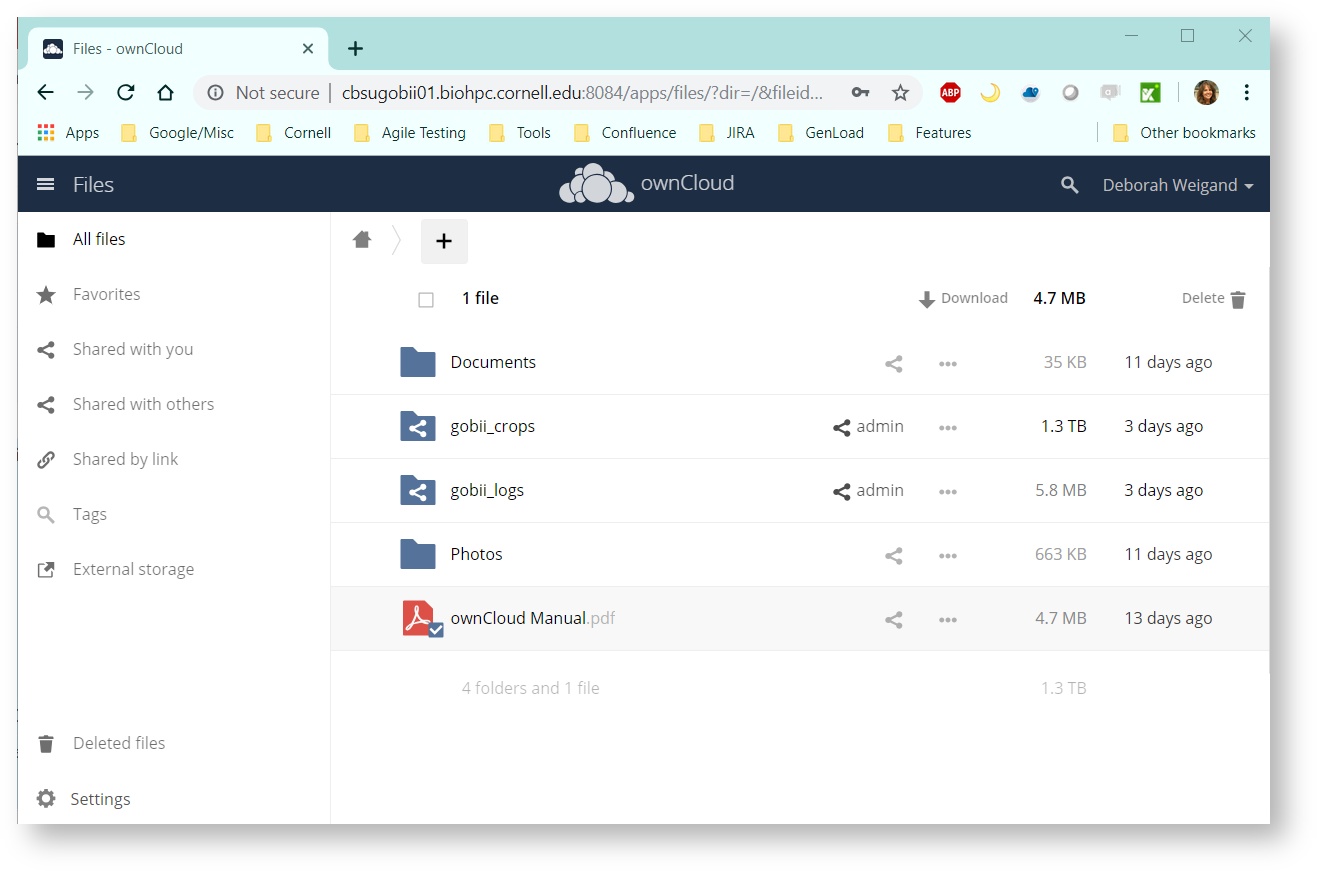
Upon login or selection of the home icon, the user is presented with a set of folders and a file.
- Documents
- gobii_crops
- gobii_logs
- Photos
- ownCloud Manual
The left sidebar on the Files page contains several filters for quickly sorting and managing your files.
GOBii folders:
- gobii_crops [/data/gobii_bundle/crops]
- <cropname>
- extractor
- done
- inprogress
- instructions
- output
- files
- hdf5
- loader
- digest
- done
- inprogress
- instructions
- qc
- extractor
- notices
- confidentiality.txt
- <cropname>
- gobii_logs
File Controls
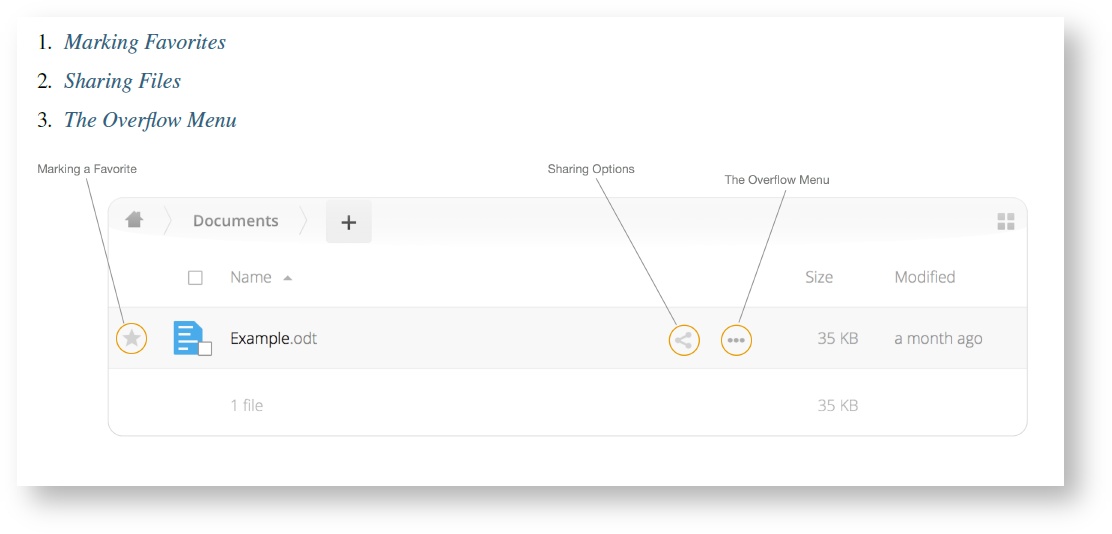
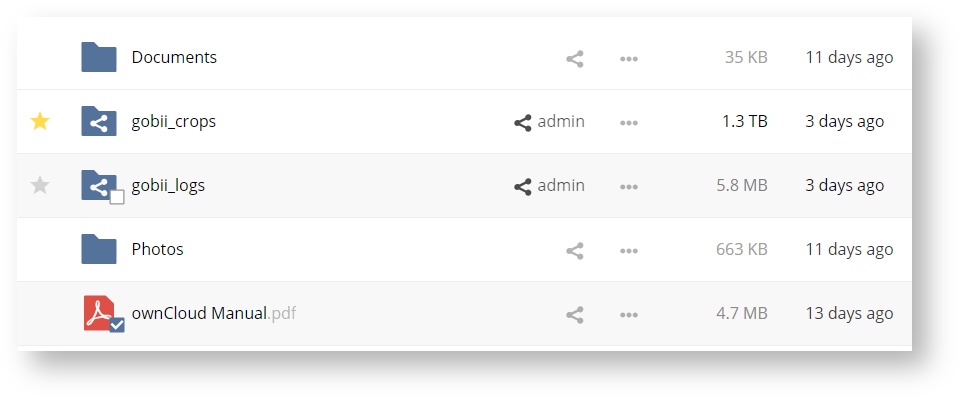
When you mouseover, or hover over, a file in the Files view, as in the image below, ownCloud displays three file controls. These are:
- Marking Favorites
- Sharing Files
- The Overflow Menu
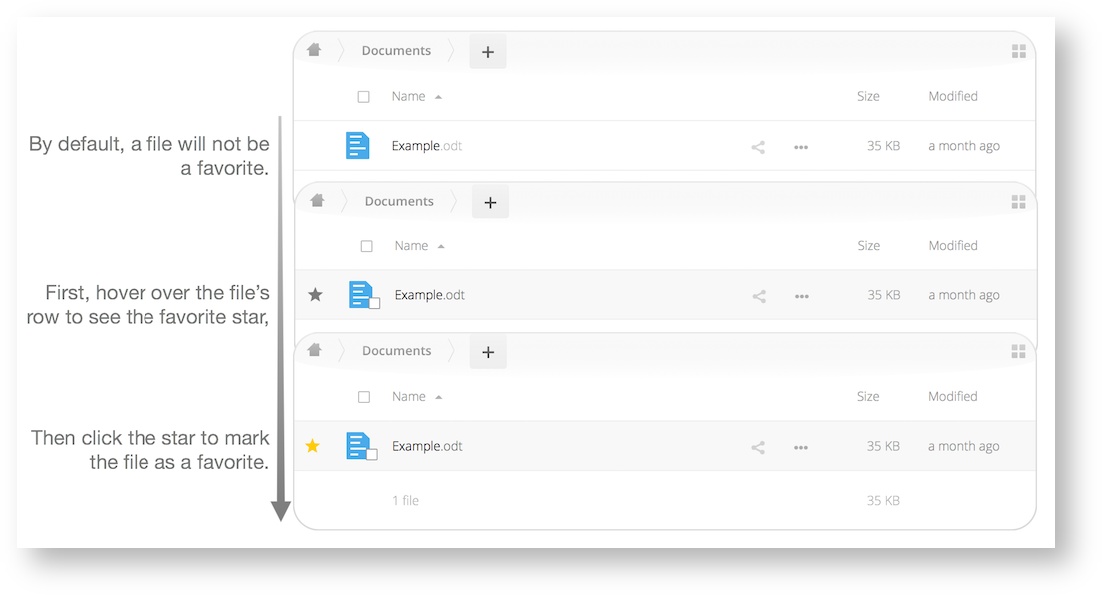
Marking Favorites
Click the star to the left of the file icon to mark it as a favorite, and quickly find all of your favorites with the Favorites filter on the left sidebar.
The Overflow Menu
The Overflow Menu allows you to:
- Display File Details
- Rename files
- Download files
- Unshare

Navigating the WebUI
Navigating through folders in ownCloud is as simple as clicking on a folder to open it and using the back button on your browser to move to a previous level. This section walks you through how to navigate the ownCloud UI.
Create and Upload Files and Directories
At the top of the Files view is a navigation bar. This contains links to upload new files, and create new files and folders:
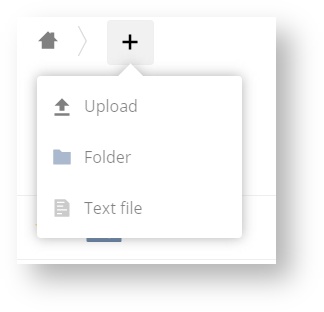
To upload or create new files or folders directly in an ownCloud folder click on the New button in the navigation bar (this is the + button). There, as in the image above, you can see links to:
- Upload a new file: This uploads files from your computer into ownCloud. You can also upload files by dragging and dropping them from your file manager.
- Create a new text file: This creates a new text file and adds the file to your current folder.
- Create a new folder: This creates a new folder within the current folder.
Select Files or Folders
You can select one or more files or folders by hovering over them (as in the image below) and clicking on their checkboxes. To select all files in the current directory, click on the checkbox located at the top of the files listing.
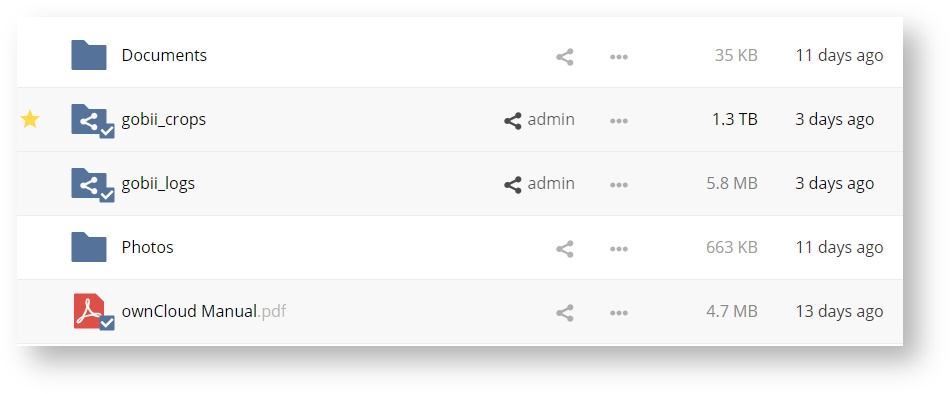
When you select multiple files, you can delete all of them, or download them as a ZIP file by using the Delete or Download buttons that appear at the top.
| You can move files and folders by dragging and dropping them into any directory. |
Preview/Download
ownCloud can display previews of your files. If ownCloud cannot display a file, i.e. because it is too large, it will start a download process and downloads the file to your computer.
Sharing Files
Clicking the share icon on any file or folder opens the Details view on the right, where the Share tab has focus.
Sharing Status Icons
Any folder that has been shared is marked with the Shared overlay icon. Public link shares are marked with a chain link. Un-shared folders are blank.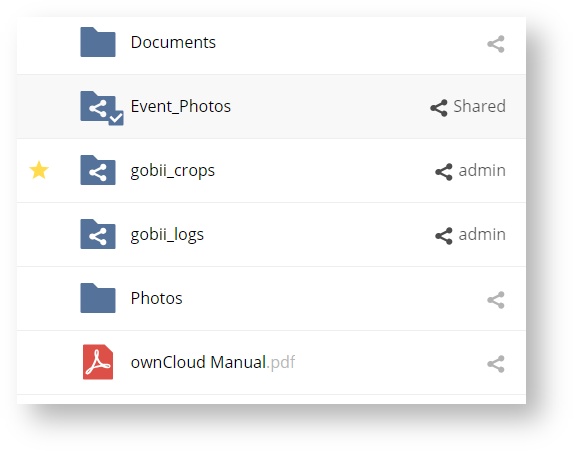
Creating Shares
To share a file or folder, immediately below the Share tab, you will see a text field. In this field, you can enter any number of users (whether local to your ownCloud server or remote) or groups with whom you would like to share the file or folder.
If username auto-completion is enabled, when you start typing the user or group name ownCloud will automatically complete it for you, if possible.
After a file or folder has been shared, Share Permissions can be set on it. In the image below, you can see that the directory “event-Photos” is shared with the user “pierpont”, who can share, edit, create, change, and delete the directory.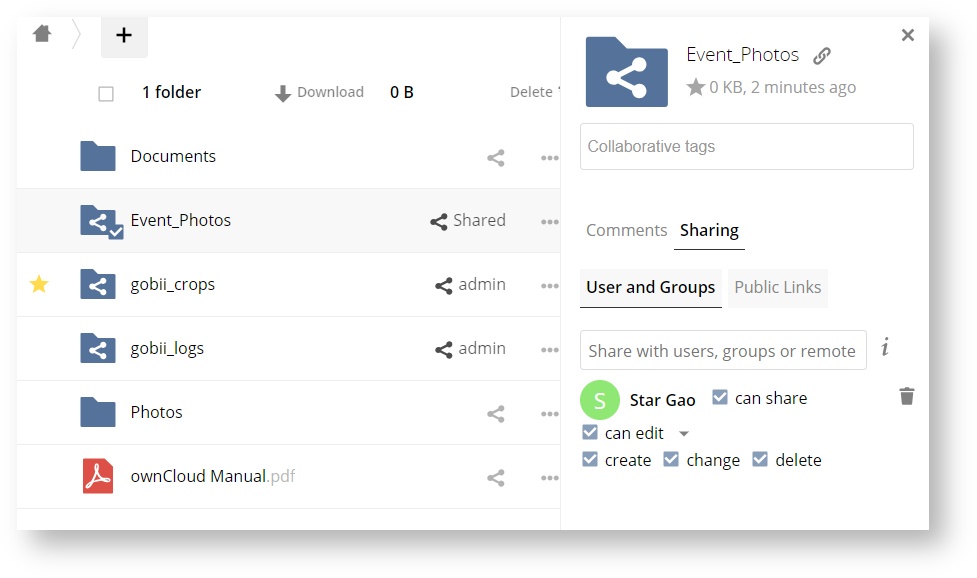
Password Protecting File
It’s also possible to password protect shared files and folders. If you want to do so, then enable this functionality: click the checkbox labeled “Password protect” under the “Share Link” section.
You’ll see a password field appear. Add the password that the user will need to enter to access the shared resource, and press the return key.
Using Private Links
Another way to access a file or folder is via a private link. It’s a handy way of creating a permanent link for yourself or to point others to a file or folder, within a share, more efficiently.
To access the private link, in the Sharing Panel for a file or folder, next to its name you’ll see a small link icon (1), as in the screenshot below.